本文主要包括以下内容
- PixelRatio模块
- Vibration模块
- AppRegistry模块
- Linking模块
- LayoutAnimation模块
PixelRatio模块
PiexlRatio模块该我们提供了获取设备屏幕密度的方法。
获取指定尺寸大小的图片:如果你的应用运行在一个高像素密度的设备上面,那么你需要显示的图片也要高像素密度。对于这种情况一般的做法就是图片显示的尺寸乘以像素比。具体代码如下:
var image = getImage({
  width: PixelRatio.getPixelSizeForLayoutSize(200),
  height: PixelRatio.getPixelSizeForLayoutSize(100),
});
<Image source={image} style= />
example
/**
 * Sample React Native App
 * https://github.com/facebook/react-native
 */
'use strict';
import React, {
  AppRegistry,
  Component,
  StyleSheet,
  Text,
  View,
  PixelRatio,
} from 'react-native';

class PixelPatioDemo extends Component {
  render() {
    return (
      <View style={styles.container}>
        <Text style={styles.welcome}>
           PixelRatio实例测试:
        </Text>
        <Text style={styles.instructions}>
           当前的屏幕像素密度比例为:{PixelRatio.get()};
        </Text>
      </View>
    );
  }
}
const styles = StyleSheet.create({
  container: {
    flex: 1,
    justifyContent: 'center',
    alignItems: 'center',
    backgroundColor: '#F5FCFF',
  },
  welcome: {
    fontSize: 20,
    textAlign: 'center',
    margin: 10,
  },
  instructions: {
    textAlign: 'center',
    color: '#333333',
    marginBottom: 5,
  },
});
AppRegistry.registerComponent('PixelPatioDemo', () => PixelPatioDemo);
effect

Vibration模块
Vibration API模块使用Vibration.vibrate()方法进行调用控制设备震动。当前vibration方法是异步的,所以当我们调用的时候该会立即返回结果。当前模块不支持所有的设备,如果当前是iOS模拟器的话,那么调用时没有反应的。
如果是android设备,就需要在AndroidManifest.xml文件中添加权限:
example
/**
* Sample React Native App
* https://github.com/facebook/react-native
*/
import React, {
AppRegistry,
Component,
StyleSheet,
Text,
View,
TouchableHighlight,
Vibration,
} from 'react-native';
class CustomButton extends React.Component {
render() {
return (
<TouchableHighlight
style={styles.button}
underlayColor="#a5a5a5"
onPress={this.props.onPress}>
<Text style={styles.buttonText}>{this.props.text}</Text>
</TouchableHighlight>
);
}
}
class StatusBarIOS extends Component {
render() {
return (
<View>
<Text style={styles.welcome}>
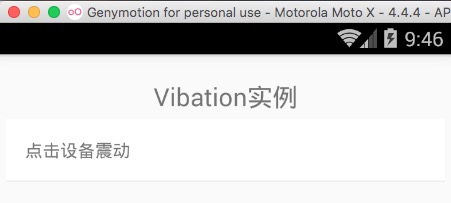
Vibation实例
</Text>
<CustomButton
text="点击设备震动"
onPress={()=>Vibration.vibrate()}
/>
</View>
);
}
}
const styles = StyleSheet.create({
welcome: {
fontSize: 20,
textAlign: 'center',
marginTop: 20,
},
button: {
margin:5,
backgroundColor: 'white',
padding: 15,
borderBottomWidth: StyleSheet.hairlineWidth,
borderBottomColor: '#cdcdcd',
},
});
AppRegistry.registerComponent('StatusBarIOS', () => StatusBarIOS);
effect
AppRegistry模块
AppRegistry模式是React Native中最基本的模块,也是最常用的模块。AppRegistry模块是React Native应用JavaScript运行的入口。应用的跟组件应用使用AppRegistry.registerComponent进行注册自己。然后原生系统就可以进行加载运行bundle文件包,最后就会可以调用AppRegistry.runApplication进行运行起来应用。
当一个视图被摧毁的时候,为了结束应用可以调用AppRegistry.unmountApplictionComponentAtRootTag方法。其中该方法中的参数和runApplication中的要一样,该规则一定要遵守哦~
AppRegister模块需要在其他模块导入之前尽可能早点被导入进来来让JS环境可以正常运行。
属性方法
-
registerConfig(config:Array
) static 静态方法, 进行注册配置信息 -
registerComponent(appKey:string,getComponentFunc:ComponentProvider) static静态方法,进行注册组件
-
registerRunnable(appKey:string,func:Function) static静态方法 ,进行注册线程
-
registerAppKeys() static静态方法,进行获取所有组件的keys值
-
runApplication(appKey:string,appParameters:any) static静态方法, 进行运行应用
-
unmountApplicationComponentAtRootTag() static静态方法,结束应用
Linking模块
Linking模块给我们提供了Android和iOS双平台通用的接口进行处理App进入和传出的链接。
处理链接
如果你的应用被其他任何注册过的外部URL进行唤起,那么你可以在任何组件中进行获取并且处理。具体代码如下:
componentDidMount() {
  var url = Linking.getInitialURL().then((url) => {
    if (url) {
      console.log('Initial url is: ' + url);
    }
  }).catch(err => console.error('An error occurred', err));
}
对于Android平台上面,如何进行支持深度链接的更多信息可以点击查询:Enabling Deep Links for App Content - Add Intent Filters for Your Deep Links 该篇文章是Android官网的,后面这边会着重讲解一下该文章的内容以及深度链接的知识点。
打开外部链接
为了启用链接对应的行为或者应用(Web URL,邮箱,联系人等),只需要如下进行调用:
Linking.openURL(url).catch(err => console.error('An error occurred', err));
如果你需要检查一下打开的链接的应用是否被安装,你可以调用如下的代码:
Linking.canOpenURL(url).then(supported => {
  if (!supported) {
    console.log('Can\'t handle url: ' + url);
  } else {
    return Linking.openURL(url);
  }
}).catch(err => console.error('An error occurred', err));
example
/**
* React Native For Android端进行根据URL打开系统的应用
* https://github.com/facebook/react-native
*/
import React, {
AppRegistry,
Component,
StyleSheet,
Text,
View,
Linking,
TouchableHighlight,
} from 'react-native';
class CustomButton extends React.Component {
constructor(props){
super(props);
}
propTypes: {
url: React.PropTypes.string,
}
render() {
return (
<TouchableHighlight
style={styles.button}
underlayColor="#a5a5a5"
onPress={()=>Linking.canOpenURL(this.props.url).then(supported => {
if (supported) {
Linking.openURL(this.props.url);
} else {
console.log('无法打开该URI: ' + this.props.url);
}
})}>
<Text style={styles.buttonText}>{this.props.text}</Text>
</TouchableHighlight>
);
}
}
class LinkingDemo extends Component {
componentDidMount() {
var url = Linking.getInitialURL().then((url) => {
if (url) {
console.log('捕捉的URL地址为: ' + url);
}
}).catch(err => console.error('错误信息为:', err));
}
render() {
return (
<View>
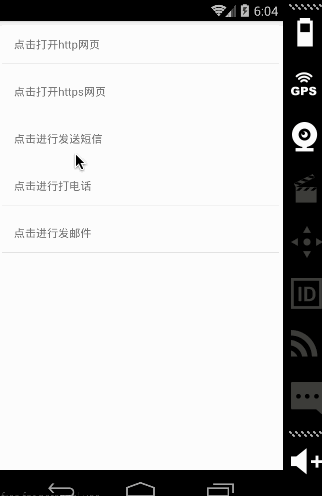
<CustomButton url={'http://www.lcode.org'} text="点击打开http网页"/>
<CustomButton url={'https://www.baidu.com'} text="点击打开https网页"/>
<CustomButton url={'smsto:18352402477'} text="点击进行发送短信"/>
<CustomButton url={'tel:18352402477'} text="点击进行打电话"/>
<CustomButton url={'mailto:jiangqqlmj@163.com'} text="点击进行发邮件"/>
</View>
);
}
}
const styles = StyleSheet.create({
button: {
margin:5,
backgroundColor: 'white',
padding: 15,
borderBottomWidth: StyleSheet.hairlineWidth,
borderBottomColor: '#cdcdcd',
},
});
AppRegistry.registerComponent('LinkingDemo', () => LinkingDemo);
effect
LayoutAnimation模块
该模块用于当试图的布局发生变化的时候,自动将该试图运行到新的位置。一个比较通用的使用方法为:在调用setState方法之前调用LayoutAnimation.configureNext()方法进行使用。
常用方法
2configureNext(config,onAnimationDidEnd?) 静态方法,进行计算下一个变化的布局动画。其中参数如下:
@参数config 该涉及到动画属性有:
duration   动画持续的时间(毫秒)
create     创建一个新视图所使用的动画(具体可以查看Anim类型)
update   当视图被更新的时候所使用的动画(具体可以查看Anim类型)
@参数 onAnimationDidEnd 当动画完成的时候调用的方法,当前仅支持iOS设备
@参数 onError 当动画发生错误的时候调用的方法,当前仅支持iOS设备
create(duration,type,createionProp) 静态方法 该用来创建configureNext的方法
example
.如果你在Android设备上面进行测试,那么就需要开启动画设置,iOS设备默认打开。具体代码如下:
// Enable LayoutAnimation under Android
     if (Platform.OS === 'android') {
        UIManager.setLayoutAnimationEnabledExperimental(true)
      }
当我们布局需要更新的时候,使用LayoutAnimation进行设置一下动画配置即可如下
componentWillUpdate() {
  console.log('componentWillUpdate...');
  LayoutAnimation.easeInEaseOut();
}
完整代码
/**
* Sample React Native App
* https://github.com/facebook/react-native
* @flow
*/
import React, { Component } from 'react';
import {
AppRegistry,
StyleSheet,
Text,
View,
LayoutAnimation,
TouchableHighlight,
ToastAndroid,
Platform,
UIManager
} from 'react-native';
class CustomButton extends Component {
render() {
return (
<TouchableHighlight
style={styles.button}
underlayColor="#a5a5a5"
onPress={this.props.onPress}>
<Text style={styles.buttonText}>{this.props.text}</Text>
</TouchableHighlight>
);
}
}
var CustomLayoutAnimation = {
duration: 800,
create: {
type: LayoutAnimation.Types.linear,
property: LayoutAnimation.Properties.opacity,
},
update: {
type: LayoutAnimation.Types.easeInEaseOut,
},
};
class LayoutAnimationDemo extends Component {
constructor(props) {
super(props);
this.state={
views:[],
num:0,
}
// Enable LayoutAnimation under Android
if (Platform.OS === 'android') {
UIManager.setLayoutAnimationEnabledExperimental(true)
}
}
componentWillUpdate() {
console.log('componentWillUpdate...');
LayoutAnimation.easeInEaseOut();
//或者可以使用如下的自定义的动画效果
//LayoutAnimation.configureNext(CustomLayoutAnimation);
}
_onPressAddView() {
this.setState({num:Number.parseInt(this.state.num)+1});
}
_onPressRemoveView() {
this.setState({num:Number.parseInt(this.state.num)-1});
}
_renderAddedView(i) {
return (
<View key={i} style={styles.view}>
<Text style=>{i}</Text>
</View>
);
}
render() {
this.state.views.length=0;
for(var i=0;i<this.state.num;i++){
this.state.views.push(this._renderAddedView(i));
}
return (
<View style=>
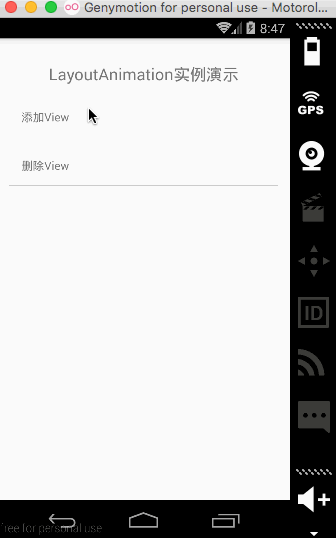
<Text style={styles.welcome}>
LayoutAnimation实例演示
</Text>
<CustomButton text="添加View" onPress={this._onPressAddView.bind(this)}/>
<CustomButton text="删除View" onPress={this._onPressRemoveView.bind(this)}/>
<View style={styles.viewContainer}>
{this.state.views}
</View>
</View>
);
}
}
const styles = StyleSheet.create({
welcome: {
fontSize: 20,
textAlign: 'center',
margin: 10,
},
button: {
margin:5,
backgroundColor: 'white',
padding: 15,
borderBottomWidth: StyleSheet.hairlineWidth,
borderBottomColor: '#cdcdcd',
},
viewContainer: {
flex: 1,
flexDirection: 'row',
flexWrap: 'wrap',
},
view: {
height: 50,
width: 50,
backgroundColor: 'green',
margin: 8,
alignItems: 'center',
justifyContent: 'center',
},
});
AppRegistry.registerComponent('LayoutAnimationDemo', () => LayoutAnimationDemo);
effect