This papper mainly includes the following contents
- Segment
- Basic Usage
- Slides
- Tabs
- Toast
- Toggle
- Toolbar
Segment
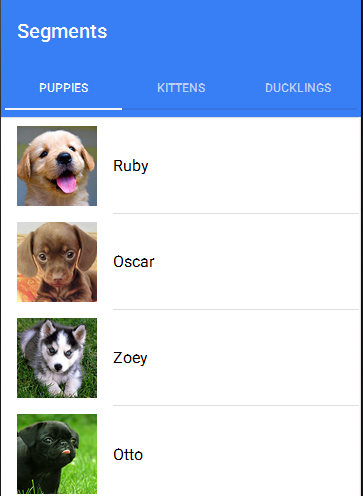
Segment is a collection of buttons that are displayed in line. They can act as a filter, showing/hiding elements based on the segments value.
Basic Usage
<div padding>
  <ion-segment [(ngModel)]="pet">
    <ion-segment-button value="kittens">
      Kittens
    </ion-segment-button>
    <ion-segment-button value="puppies">
      Puppies
    </ion-segment-button>
  </ion-segment>
</div>

<div [ngSwitch]="pet">
  <ion-list *ngSwitchWhen="'puppies'">
    <ion-item>
      <ion-thumbnail item-left>
        <img src="img/thumbnail-puppy-1.jpg">
      </ion-thumbnail>
      <h2>Ruby</h2>
    </ion-item>
    ...
  </ion-list>

  <ion-list *ngSwitchWhen="'kittens'">
    <ion-item>
      <ion-thumbnail item-left>
        <img src="img/thumbnail-kitten-1.jpg">
      </ion-thumbnail>
      <h2>Luna</h2>
    </ion-item>
    ...
  </ion-list>
</div>
Select
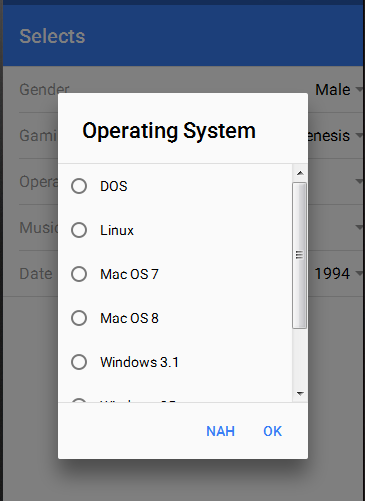
The ion-select component is similar to an HTML
<ion-list>
  <ion-item>
    <ion-label>Gaming</ion-label>
    <ion-select [(ngModel)]="gaming">
      <ion-option value="nes">NES</ion-option>
      <ion-option value="n64">Nintendo64</ion-option>
      <ion-option value="ps">PlayStation</ion-option>
      <ion-option value="genesis">Sega Genesis</ion-option>
      <ion-option value="saturn">Sega Saturn</ion-option>
      <ion-option value="snes">SNES</ion-option>
    </ion-select>
  </ion-item>
</ion-list>
Slides
Basic Usage
<ion-slides pager>

  <ion-slide style="background-color: green">
    <h2>Slide 1</h2>
  </ion-slide>

  <ion-slide style="background-color: blue">
    <h2>Slide 2</h2>
  </ion-slide>

  <ion-slide style="background-color: red">
    <h2>Slide 3</h2>
  </ion-slide>

</ion-slides>
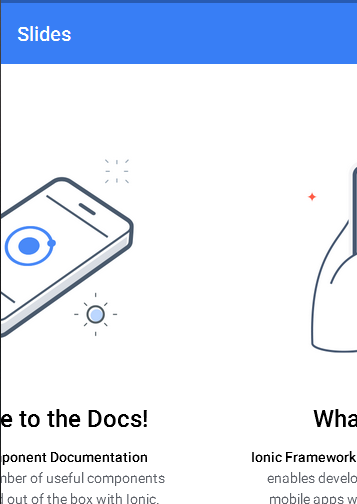
Slides take a number of configuration options on the
Tabs
Tabs powers a multi-tabbed interface with a Tab Bar and a set of “pages” that can be tabbed through.
For iOS, tabs will appear at the bottom of the screen. For Android, tabs will be at the top of the screen, below the nav-bar. This follows each platform’s design specification, but can be configured with Config.
Tabs are useful if you have a few “root” or “top-level” pages. They are obvious to the user and quickly accessed, since they are always on the screen. However if screen space is limited, or you have a large number of root pages, a Menu may be a better option.
Basic Usage
To initialize Tabs, use
@Component({
  template: `
    <ion-tabs>
      <ion-tab tabIcon="heart" [root]="tab1"></ion-tab>
      <ion-tab tabIcon="star" [root]="tab2"></ion-tab>
    </ion-tabs>`
})
class MyApp {
  constructor() {
    this.tab1 = Tab1;
    this.tab2 = Tab2;
  }
}
ionicBootstrap(MyApp)
Individual tabs are just @Components
@Component({
  template: `
  <ion-header>
    <ion-navbar>
      <ion-title>Heart</ion-title>
    </ion-navbar>
  </ion-header>
  <ion-content>Tab 1</ion-content>`
})
class Tab1 {}

@Component({
  template: `
  <ion-header>
    <ion-navbar>
      <ion-title>Star</ion-title>
    </ion-navbar>
  </ion-header>
  <ion-content>Tab 2</ion-content>`
})
class Tab2 {}
Notice that each
Icon Tabs
To add an icon inside of a tab, use the tab-icon attribute. This attribute can be passed the name of any icon:
@Component({
  template: `
  <ion-header>
    <ion-navbar>
      <ion-title>Tabs</ion-title>
    </ion-navbar>
  </ion-header>
  <ion-content></ion-content>
  `
})
class TabContentPage {
  constructor() {}
}

@Component({
  template: `
  <ion-tabs>
    <ion-tab tabIcon="contact" [root]="tab1"></ion-tab>
    <ion-tab tabIcon="compass" [root]="tab2"></ion-tab>
    <ion-tab tabIcon="analytics" [root]="tab3"></ion-tab>
    <ion-tab tabIcon="settings" [root]="tab4"></ion-tab>
  </ion-tabs>`
})
export class TabsIconPage {
  constructor() {
    this.tab1 = TabContentPage;
    this.tab2 = TabContentPage;
    ...
  }
}
Icon and Text
To add text and an icon inside of a tab, use the tab-icon and tab-title attributes:
@Component({
  template: `
  <ion-header>
    <ion-navbar>
      <ion-title>Tabs</ion-title>
    </ion-navbar>
  </ion-header>
  <ion-content></ion-content>
  `
})
class TabsTextContentPage {
  constructor() {}
}

@Component({
  template: `
  <ion-tabs>
    <ion-tab tabIcon="water" tabTitle="Water" [root]="tab1"></ion-tab>
    <ion-tab tabIcon="leaf" tabTitle="Life" [root]="tab2"></ion-tab>
    <ion-tab tabIcon="flame" tabTitle="Fire" [root]="tab3"></ion-tab>
    <ion-tab tabIcon="magnet" tabTitle="Force" [root]="tab4"></ion-tab>
  </ion-tabs>`
})
export class TabsTextPage {
  constructor() {
    this.tab1 = TabsTextContentPage;
    this.tab2 = TabsTextContentPage;
    ...
  }
}
Badges
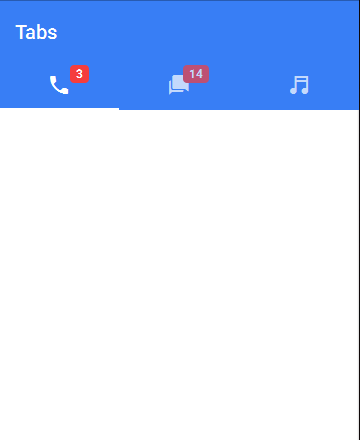
To add a badge to a tab, use the tabBadge and tabBadgeStyle attributes. The tabBadgeStyle attribute can be passed the name of any color:
@Component({
  template: `
  <ion-header>
    <ion-navbar>
      <ion-title>Tabs</ion-title>
    </ion-navbar>
  </ion-header>
  <ion-content></ion-content>
  `
})
class TabBadgePage {
  constructor() {}
}

@Component({
  template: `
    <ion-tabs>
      <ion-tab tabIcon="call" [root]="tabOne" tabBadge="3" tabBadgeStyle="danger"></ion-tab>
      <ion-tab tabIcon="chatbubbles" [root]="tabTwo" tabBadge="14" tabBadgeStyle="danger"></ion-tab>
      <ion-tab tabIcon="musical-notes" [root]="tabThree"></ion-tab>
    </ion-tabs>
    `
})
export class BadgesPage {
  constructor() {
    this.tabOne = TabBadgePage;
    this.tabTwo = TabBadgePage;
  }
}
Toast
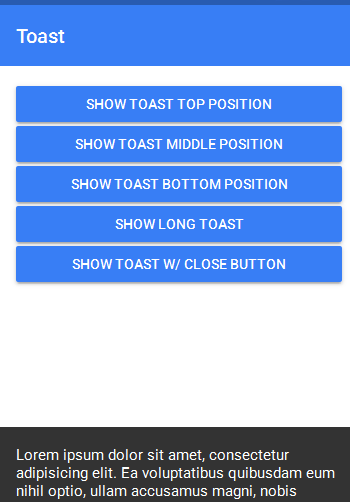
Toast is a simple component that allows you display a notification at the bottom of the screen. The toast appears on top of the app’s content, and can be dismissed by the app to resume user interaction with the app. It includes a backdrop, which can optionally be clicked to dismiss the toast.
Basic Usage
presentToast() {
  let toast = Toast.create({
    message: 'User was added successfully',
    duration: 3000
  });

  toast.onDismiss(() => {
    console.log('Dismissed toast');
  });

  this.nav.present(toast);
  }
Toggle
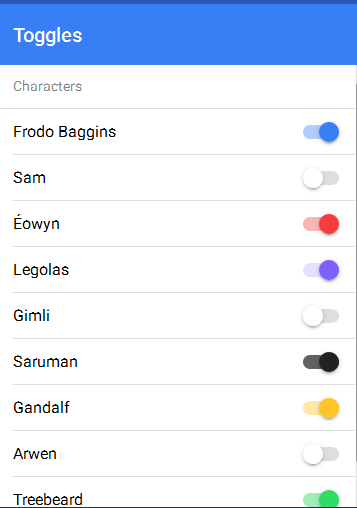
A toggle is an input component that holds a boolean value. Like the checkbox, toggles are often used to allow the user to switch a setting on or off. Attributes like value, disabled, and checked can be applied to the toggle to control its behavior. Check out the Toggle API Reference for more information.
Basic Usage
<ion-item>
  <ion-label> Sam</ion-label>
  <ion-toggle disabled checked="false"></ion-toggle>
</ion-item>
Toolbar
A toolbar is a generic bar that can be used in an app as a header, sub-header, footer, or even sub-footer. Since ion-toolbar is based on flexbox, no matter how many toolbars you have in your page, they will be displayed correctly and ion-content will adjust accordingly.
Basic Usage
Add the property position=”bottom” to place the tool bar below the content:
<ion-toolbar>
  <ion-title>Toolbar</ion-title>
</ion-toolbar>

<ion-content></ion-content>

<ion-toolbar position="bottom">
  <ion-title>Footer</ion-title>
</ion-toolbar>
Header
One of the best uses of the toolbar is as a header.
<ion-toolbar primary>
  <ion-buttons start>
    <icon name="content"></icon>
  </ion-buttons>

  <ion-title>Header</ion-title>

  <ion-buttons end>
    <icon name="search"></icon>
  </ion-buttons>

</ion-toolbar>

<ion-content>
  <p>There is a header above me!</p>
</ion-content>
Buttons in Toolbars
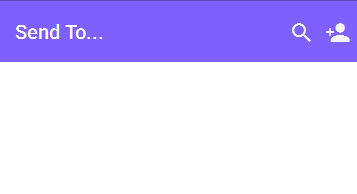
Buttons can be added to both header and footer toolbars. To add a button to a toolbar, we need to first add an ion-buttons component. This component wraps one or more buttons, and can be given the start or end attributes to control the placement of the buttons it contains:
<ion-toolbar>
  <ion-buttons start>
    <button royal>
      <ion-icon name="search"></ion-icon>
    </button>
  </ion-buttons>
  <ion-title>Send To...</ion-title>
  <ion-buttons end>
    <button royal>
      <ion-icon name="person-add"></ion-icon>
    </button>
  </ion-buttons>
</ion-toolbar>

<ion-content></ion-content>

<ion-toolbar position="bottom">
  <p>Ash, Misty, Brock</p>
  <ion-buttons end>
    <button royal>
      Send
      <ion-icon name="send"></ion-icon>
    </button>
  </ion-buttons>
</ion-toolbar>
Segment in Toolbars
Segments are a great way to allow users to switch between different sets of data. Use the following markup to add a segment to a toolbar:
<ion-toolbar>
  <ion-buttons start>
    <button>
      <ion-icon name="create"></ion-icon>
    </button>
  </ion-buttons>
  <ion-segment>
    <ion-segment-button value="new">
      New
    </ion-segment-button>
    <ion-segment-button value="hot">
      Hot
    </ion-segment-button>
  </ion-segment>
  <ion-buttons end>
    <button>
      <ion-icon name="more"></ion-icon>
    </button>
  </ion-buttons>
</ion-toolbar>
Searchbar in Toolbars
Another common design paradigm is to include a searchbar inside your toolbar.
<ion-toolbar primary>
  <ion-searchbar (input)="getItems($event)"></ion-searchbar>
</ion-toolbar>

<ion-content>
  <ion-list>
    <ion-item *ngFor="let item of items">

    </ion-item>
  </ion-list>
</ion-content>
@Component({
  templateUrl: 'search/template.html',
})
class SearchPage {
  constructor() {
    this.initializeItems();
  }

  initializeItems() {
    this.items = [
      'Angular 1.x',
      'Angular 2',
      'ReactJS',
      'EmberJS',
      'Meteor',
      'Typescript',
      'Dart',
      'CoffeeScript'
    ];
  }

  getItems(ev) {
    // Reset items back to all of the items
    this.initializeItems();

    // set val to the value of the searchbar
    var val = ev.target.value;

    // if the value is an empty string don't filter the items
    if (val && val.trim() != '') {
      this.items = this.items.filter((item) => {
        return (item.toLowerCase().indexOf(val.toLowerCase()) > -1);
      })
    }
  }
}
Changing the Color
You can change the toolbars color by changing the property on the element
@Component({
  template: `
    <ion-toolbar primary>
      <ion-title>Toolbar</ion-title>
    </ion-toolbar>


    <ion-toolbar secondary>
      <ion-title>Toolbar</ion-title>
    </ion-toolbar>

    <ion-toolbar danger>
      <ion-title>Toolbar</ion-title>
    </ion-toolbar>


    <ion-toolbar dark>
      <ion-title>Toolbar</ion-title>
    </ion-toolbar>
  `
  })
