We’ll be building a simple but realistic comments box that you can drop into a blog, a basic version of the realtime comments offered by Disqus, LiveFyre or Facebook comments.
We’ll provide:
- A view of all of the comments
- A form to submit a comment
- Hooks for you to provide a custom backend
It’ll also have a few neat features:
- **Optimistic commenting: **comments appear in the list before they’re saved on the server so it feels fast.
- **Live updates: **other users’ comments are popped into the comment view in real time.
- **Markdown formatting: **users can use Markdown to format their text.
Want to skip all this and just see the source?
Running a server
There are several simple server implementations included. They all serve static files from public/ and handle requests to /api/comments to fetch or add data. Start a server with one of the following:
Node
npm install
node server.js
server.js codes
/**
 * This file provided by Facebook is for non-commercial testing and evaluation
 * purposes only. Facebook reserves all rights not expressly granted.
 *
 * THE SOFTWARE IS PROVIDED "AS IS", WITHOUT WARRANTY OF ANY KIND, EXPRESS OR
 * IMPLIED, INCLUDING BUT NOT LIMITED TO THE WARRANTIES OF MERCHANTABILITY,
 * FITNESS FOR A PARTICULAR PURPOSE AND NONINFRINGEMENT. IN NO EVENT SHALL
 * FACEBOOK BE LIABLE FOR ANY CLAIM, DAMAGES OR OTHER LIABILITY, WHETHER IN AN
 * ACTION OF CONTRACT, TORT OR OTHERWISE, ARISING FROM, OUT OF OR IN CONNECTION
 * WITH THE SOFTWARE OR THE USE OR OTHER DEALINGS IN THE SOFTWARE.
 */

var fs = require('fs');
var path = require('path');
var express = require('express');
var bodyParser = require('body-parser');
var app = express();

var COMMENTS_FILE = path.join(__dirname, 'comments.json');

app.set('port', (process.env.PORT || 3000));

app.use('/', express.static(path.join(__dirname, 'public')));
app.use(bodyParser.json());
app.use(bodyParser.urlencoded({extended: true}));

// Additional middleware which will set headers that we need on each request.
app.use(function(req, res, next) {
    // Set permissive CORS header - this allows this server to be used only as
    // an API server in conjunction with something like webpack-dev-server.
    res.setHeader('Access-Control-Allow-Origin', '*');

    // Disable caching so we'll always get the latest comments.
    res.setHeader('Cache-Control', 'no-cache');
    next();
});

app.get('/api/comments', function(req, res) {
  fs.readFile(COMMENTS_FILE, function(err, data) {
    if (err) {
      console.error(err);
      process.exit(1);
    }
    res.json(JSON.parse(data));
  });
});

app.post('/api/comments', function(req, res) {
  fs.readFile(COMMENTS_FILE, function(err, data) {
    if (err) {
      console.error(err);
      process.exit(1);
    }
    var comments = JSON.parse(data);
    // NOTE: In a real implementation, we would likely rely on a database or
    // some other approach (e.g. UUIDs) to ensure a globally unique id. We'll
    // treat Date.now() as unique-enough for our purposes.
    var newComment = {
      id: Date.now(),
      author: req.body.author,
      text: req.body.text,
    };
    comments.push(newComment);
    fs.writeFile(COMMENTS_FILE, JSON.stringify(comments, null, 4), function(err) {
      if (err) {
        console.error(err);
        process.exit(1);
      }
      res.json(comments);
    });
  });
});


app.listen(app.get('port'), function() {
  console.log('Server started: http://localhost:' + app.get('port') + '/');
});
client code
<!DOCTYPE html>
<html>
  <head>
    <meta charset="utf-8">
    <title>React Tutorial</title>
    <!-- Not present in the tutorial. Just for basic styling. -->
    <link rel="stylesheet" href="css/base.css" />
    <script src="https://cdnjs.cloudflare.com/ajax/libs/react/15.2.0/react.js"></script>
    <script src="https://cdnjs.cloudflare.com/ajax/libs/react/15.2.0/react-dom.js"></script>
    <script src="https://cdnjs.cloudflare.com/ajax/libs/babel-core/5.6.16/browser.js"></script>
    <script src="https://cdnjs.cloudflare.com/ajax/libs/jquery/2.2.2/jquery.min.js"></script>
    <script src="https://cdnjs.cloudflare.com/ajax/libs/remarkable/1.6.2/remarkable.min.js"></script>
  </head>
  <body>
    <div id="content"></div>

    <script type="text/babel">
      // To get started with this tutorial running your own code, simply remove
      // the script tag loading scripts/example.js and start writing code here.

var Comment = React.createClass({
  rawMarkup: function() {
    var md = new Remarkable();
    var rawMarkup = md.render(this.props.children.toString());
    return { __html: rawMarkup };
  },

  render: function() {
    return (
      <div className="comment">
        <h2 className="commentAuthor">
          {this.props.author}
        </h2>
        <span dangerouslySetInnerHTML={this.rawMarkup()} />
      </div>
    );
  }
});

var CommentBox = React.createClass({
  loadCommentsFromServer: function() {
    $.ajax({
      url: this.props.url,
      dataType: 'json',
      cache: false,
      success: function(data) {
        this.setState({data: data});
      }.bind(this),
      error: function(xhr, status, err) {
        console.error(this.props.url, status, err.toString());
      }.bind(this)
    });
  },
  handleCommentSubmit: function(comment) {
    var comments = this.state.data;
    // Optimistically set an id on the new comment. It will be replaced by an
    // id generated by the server. In a production application you would likely
    // not use Date.now() for this and would have a more robust system in place.
    comment.id = Date.now();
    var newComments = comments.concat([comment]);
    this.setState({data: newComments});
    $.ajax({
      url: this.props.url,
      dataType: 'json',
      type: 'POST',
      data: comment,
      success: function(data) {
        this.setState({data: data});
      }.bind(this),
      error: function(xhr, status, err) {
        this.setState({data: comments});
        console.error(this.props.url, status, err.toString());
      }.bind(this)
    });
  },
  getInitialState: function() {
    return {data: []};
  },
  componentDidMount: function() {
    this.loadCommentsFromServer();
    setInterval(this.loadCommentsFromServer, this.props.pollInterval);
  },
  render: function() {
    return (
      <div className="commentBox">
        <h1>Comments</h1>
        <CommentList data={this.state.data} />
        <CommentForm onCommentSubmit={this.handleCommentSubmit} />
      </div>
    );
  }
});

var CommentList = React.createClass({
  render: function() {
    var commentNodes = this.props.data.map(function(comment) {
      return (
        <Comment author={comment.author} key={comment.id}>
          {comment.text}
        </Comment>
      );
    });
    return (
      <div className="commentList">
        {commentNodes}
      </div>
    );
  }
});

var CommentForm = React.createClass({
  getInitialState: function() {
    return {author: '', text: ''};
  },
  handleAuthorChange: function(e) {
    this.setState({author: e.target.value});
  },
  handleTextChange: function(e) {
    this.setState({text: e.target.value});
  },
  handleSubmit: function(e) {
    e.preventDefault();
    var author = this.state.author.trim();
    var text = this.state.text.trim();
    if (!text || !author) {
      return;
    }
    this.props.onCommentSubmit({author: author, text: text});
    this.setState({author: '', text: ''});
  },
  render: function() {
    return (
      <form className="commentForm" onSubmit={this.handleSubmit}>
        <input
          type="text"
          placeholder="Your name"
          value={this.state.author}
          onChange={this.handleAuthorChange}
        />
        <input
          type="text"
          placeholder="Say something..."
          value={this.state.text}
          onChange={this.handleTextChange}
        />
        <input type="submit" value="Post" />
      </form>
    );
  }
});

ReactDOM.render(
  <CommentBox url="/api/comments" pollInterval={2000} />,
  document.getElementById('content')
);

    </script>
  </body>
</html>
Analyse
Adding Markdown
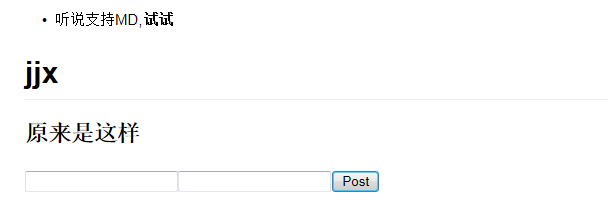
Markdown is a simple way to format your text inline. For example, surrounding text with asterisks will make it emphasized.
In this tutorial we use a third-party library remarkable which takes Markdown text and converts it to raw HTML. We already included this library with the original markup for the page, so we can just start using it. Let’s convert the comment text to Markdown and output it:
// tutorial6.js
var Comment = React.createClass({
  render: function() {
    var md = new Remarkable();
    return (
      <div className="comment">
        <h2 className="commentAuthor">
          {this.props.author}
        </h2>
        {md.render(this.props.children.toString())}
      </div>
    );
  }
});
Controlled components
With the traditional DOM, input elements are rendered and the browser manages the state (its rendered value). As a result, the state of the actual DOM will differ from that of the component. This is not ideal as the state of the view will differ from that of the component. In React, components should always represent the state of the view and not only at the point of initialization.
Hence, we will be using this.state to save the user’s input as it is entered. We define an initial state with two properties author and text and set them to be empty strings. In our input elements, we set the value prop to reflect the state of the component and attach onChange handlers to them. These input elements with a value set are called controlled components. Read more about controlled components on the Forms article.
// tutorial16.js
var CommentForm = React.createClass({
  getInitialState: function() {
    return {author: '', text: ''};
  },
  handleAuthorChange: function(e) {
    this.setState({author: e.target.value});
  },
  handleTextChange: function(e) {
    this.setState({text: e.target.value});
  },
  render: function() {
    return (
      <form className="commentForm">
        <input
          type="text"
          placeholder="Your name"
          value={this.state.author}
          onChange={this.handleAuthorChange}
        />
        <input
          type="text"
          placeholder="Say something..."
          value={this.state.text}
          onChange={this.handleTextChange}
        />
        <input type="submit" value="Post" />
      </form>
    );
  }
});
Optimization: optimistic updates
Our application is now feature complete but it feels slow to have to wait for the request to complete before your comment appears in the list. We can optimistically add this comment to the list to make the app feel faster.
// tutorial21.js
var CommentBox = React.createClass({
  loadCommentsFromServer: function() {
    $.ajax({
      url: this.props.url,
      dataType: 'json',
      cache: false,
      success: function(data) {
        this.setState({data: data});
      }.bind(this),
      error: function(xhr, status, err) {
        console.error(this.props.url, status, err.toString());
      }.bind(this)
    });
  },
  handleCommentSubmit: function(comment) {
    var comments = this.state.data;
    // Optimistically set an id on the new comment. It will be replaced by an
    // id generated by the server. In a production application you would likely
    // not use Date.now() for this and would have a more robust system in place.
    comment.id = Date.now();
    var newComments = comments.concat([comment]);
    this.setState({data: newComments});
    $.ajax({
      url: this.props.url,
      dataType: 'json',
      type: 'POST',
      data: comment,
      success: function(data) {
        this.setState({data: data});
      }.bind(this),
      error: function(xhr, status, err) {
        this.setState({data: comments});
        console.error(this.props.url, status, err.toString());
      }.bind(this)
    });
  },
  getInitialState: function() {
    return {data: []};
  },
  componentDidMount: function() {
    this.loadCommentsFromServer();
    setInterval(this.loadCommentsFromServer, this.props.pollInterval);
  },
  render: function() {
    return (
      <div className="commentBox">
        <h1>Comments</h1>
        <CommentList data={this.state.data} />
        <CommentForm onCommentSubmit={this.handleCommentSubmit} />
      </div>
    );
  }
});
Congrats!
You have just built a comment box in a few simple steps. Learn more about why to use React, or dive into the API reference and start hacking! Good luck!
References
effct